tl;dr
I created my first ever NPM package! Yay!
It’s a tool for testing websites against visual regressions. You can see it in action in the gif below:
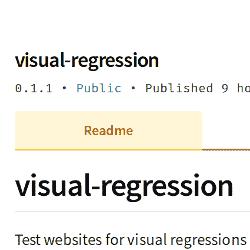
npm i visual-regression
npmjs.com/package/visual-regression
Word of warning: very early release.
Longer Version
Earlier this year, I created a test script inspired by this blog post for testing our site against visual regressions. It did not turn out to be very useful at my current project at work due to dynamically changing content such as ads etc. The test for visual regression would fail almost every time and not provide any meaningful value.
However, I was working on my blog recently and doing some changes to formatting on the code, such as adding target="_blank" on all links on my blog post.
This kind of refactorings or modifications should of course not affect the visuals of the site.
I think we have all seen sometimes templating code appear on a production site.
I was afraid, that when adding {:target="\_blank"}{:rel="noopener noreferrer"} after each link in markdown on my jekyll-based blog setup , it would be displayed on the actual HTML instead of being added as an attribute to the link.
So, how do you make sure you did not break the layout of your site when doing refactoring? Of course, I could open up every blog post I have ever published and go through all the links and make sure it looks correct (which in my case would be still doable since there are not that many posts). But as engineers, we of course want to automate everything.
Automated Visual Regression Testing
I then remembered, I had earlier this year made a test script that tests our site at the current project I’m working at against visual regressions. I took a look at the code and immediately realized it was horrible, and not suitable for general usage. I had for instance hard coded the TLD in the code.
Anyways, I first started refactoring the code towards more general purpose tool by moving all the site specific stuff, such as baseUrl etc. to be read from ENV variables.
This worked out ok, and I was able to add the project to my blog project as a git submodule and run a test against visual regressions.
This was fine and I was confident enough in shipping the code changes to “production”.
In fact after doing some minor margin modifications around images, my visual-regression tests were failing because my CSS selector was not specific enough.
Instead of modifying only the images inside the blog post content, I accidentally modified the margin around all images on the site, including header image.
This was awesome! The tool also saves the *.diff.png screenshots in case of failing tests.
That’s why it was easy to notice that my header styles were broken and a fix got deployed only few minutes after deploying the broken CSS.
Publishing as an NPM module
Because this became such a useful tool for my blog project, I was thinking that it may be useful for others as well. Thats why I’m now announcing visual-regression v.0.1.1! Please note though that this is super early release and may break. Additionally the API may break, since naming things is quite hard. I’d appreciate any feedback or issues around this tool either in Twitter or as issues in GitHub .
Publishing an NPM package was surprisingly esy. Basically, I just had to create an account and then follow these steps . Note: It’s a recommended to have two-factor-authentication required for publishing and logins in NPM.
Usage
- Install it:
npm i visual-regressionoryarn add visual-regression
After that, you can import it and test for visual regression.
The contents of your test file test/example.test.js could look something like this:
const visualRegression = require('visual-regression');

const viewportConfigs = [
  {
    width: 480,
    height: 800,
  },
  {
    width: 800,
    height: 600,
  },
  {
    width: 1024,
    height: 1024,
  },
];

describe('olpe.fi looks ok', () => {
  const options = {
    baseUrl: 'https://olpe.fi',
    testPaths: ['/', '/contact/'],
    viewportConfigs,
    baseScreenshotDirPath: 'visual-regression-screenshots',
    goldenScreenshotDirName: 'golden',
    testScreenshotDirName: 'test',
  };
  visualRegression.testVisualRegressions(options);
});
And you would run it with a test runner (here we use mocca):
"test": "mocha test/ --timeout 35000",
You probably want to add the screenshot folder to your .gitignore.
Please note however, that this is literally the firs release of this package, and everything may change or break!
The code is still horrible and needs a lot of more work. But it works for my use and it may work for somebody else as well.
Acknowledgements
- Thanks to Monica Dinculescu for writing this blog post , which has obviously been my main inspiration for creating this tool.